Our Feeds
Showing posts with label Digital Image Processing. Show all posts

Saturday, 18 March 2017

AJITH KP

RAW image to PNG Mass Converter in Java

The RAW format is used to store image files. The RAW images will have high size because it stores raw image data. To minimise the size of image file we can use this massive converter.

Raw to PNG Converter in Java

Download Link: https://github.com/ajithkp560/raw2png/archive/master.zip
Source: https://github.com/ajithkp560/raw2png

Thursday, 9 March 2017

AJITH KP

PGM Image Viewer for Windows

The "PGM"(Portable Graymap Format) file is one of the extension of image file. This type of image is normally used for researches. Most of face database is created in this format. Eg. AT & T face database. The Windows OS have no default application to open "PGM" files. This application can read and show "PGM" images. Also it can convert the PGM images to PNG/JPG/BMP formats.
You can use this application as default application for open PGM images. You can change settings by right click on PGM file and select "Open With" option and make this utility as default PGM file opener.
Download Link: https://github.com/ajithkp560/PGM_Viewer/archive/master.zip
Source Code: https://github.com/ajithkp560/PGM_Viewer

PGM File viewer and converter for Windows

Monday, 6 March 2017

AJITH KP

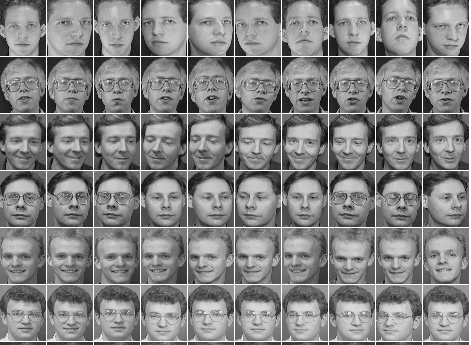
AT&T Face Database in PNG

AT&T database is one of the popular face database which is used to calculate the accuracy of face recognition system. The original AT&T face images are in "PGM" file format. The "PGM" files cannot open in some programming languages directly. Eg. Java cannot open PGM files and cannot convert it to BufferedImage object. So, the database files are converted into PNG files. This database is also known as: Olivetti - AT&T - ORL.
AT & T Face database in PNG
AT&T Face Database Sample

The original database link: http://www.cl.cam.ac.uk/research/dtg/attarchive/facedatabase.html
The database in PNG: https://drive.google.com/file/d/0B7n9cqbjuPmIWmw4V25kTEsydVk/view?usp=sharing

Friday, 3 March 2017

AJITH KP

Histogram Equalization for Color Images: Make Your Image More Clear

I have written histogram equalization tutorial with gray-scale images before. You can read that from here: http://terminalcoders.blogspot.in/2017/02/histogram-equalisation-in-java.html
The tutorial explains what is histogram equalization, algorithm and its implementation in Java. Here I'm not explaining anything about histogram equalization because already explained in that tutorial post. Only Java implementation code is sharing.
Histogram equlaization in color images

Source Code

import java.awt.GridLayout;
import java.awt.image.BufferedImage;
import java.awt.image.WritableRaster;
import java.io.File;
import javax.imageio.ImageIO;
import javax.swing.ImageIcon;
import javax.swing.JFrame;
import javax.swing.JLabel;
import javax.swing.JPanel;
import java.awt.*;


/**
 *
 * @author AJITH KP (http://fb.com/ajithkp560)
 * http://www.terminalcoders.blogspot.com
 * 
 */
public class HistogramEqualization extends JFrame{
    HistogramEqualization(String in, String out){
        super("..:: Histogram Equalization ::..");
        try {
            this.setLayout(new GridLayout(1, 2, 10, 10));
            JPanel img1 = new JPanel();
            JPanel img2 = new JPanel();
            File f1 = new File(in);
            File f2 = new File(out);
            BufferedImage image1 = ImageIO.read(f1);
            img1.add(new JLabel(new ImageIcon(image1)));
            BufferedImage image2 = equalize(image1);
            ImageIO.write(image2, "png", f2);
            img2.add(new JLabel(new ImageIcon(image2)));
            this.add(img1);
            this.add(img2);
        } catch (Exception ex) {
            System.out.println(ex.getMessage());
        }
    }
    BufferedImage equalize(BufferedImage src){
        BufferedImage nImg = new BufferedImage(src.getWidth(), src.getHeight(), src.getType());
        int[] hr = new int[256];
        int[] hg = new int[256];
        int[] hb = new int[256];
        int totpix = src.getWidth() * src.getHeight();

        for (int x = 0; x < src.getWidth(); x++) {
            for (int y = 0; y < src.getHeight(); y++) {
                Color c = new Color(src.getRGB(x, y));
                hr[c.getRed()]++;
                hg[c.getGreen()]++;
                hb[c.getBlue()]++;
            }
        }
        
        int[] chr = new int[256];
        int[] chg = new int[256];
        int[] chb = new int[256];
        chr[0] = hr[0];
        chg[0] = hg[0];
        chb[0] = hb[0];
        for(int i=1;i<256;i++){
            chr[i] = chr[i-1] + hr[i];
            chg[i] = chg[i-1] + hg[i];
            chb[i] = chb[i-1] + hb[i];
        }
        
        float[] arr = new float[256];
        float[] arg = new float[256];
        float[] arb = new float[256];
        for(int i=0;i<256;i++){
            arr[i] =  (float)((chr[i]*255.0)/(float)totpix);
            arg[i] =  (float)((chg[i]*255.0)/(float)totpix);
            arb[i] =  (float)((chb[i]*255.0)/(float)totpix);
        }
        
        for (int x = 0; x < src.getWidth(); x++) {
            for (int y = 0; y < src.getHeight(); y++) {
                Color c = new Color(src.getRGB(x, y));
                Color nc = new Color((int)arr[c.getRed()], (int)arg[c.getGreen()], (int)arb[c.getBlue()]);
                nImg.setRGB(x, y, nc.getRGB());
            }
        }
        return nImg;
    }
    /**
     * @param args the command line arguments
     */
    public static void main(String[] args) {
        System.out.println("#! TERMINALCODERS ::..\nhttp://www.terminalcoders.blogspot.com\nhttp://www.tctech.in");
        if(args.length<2){
            System.out.println("Usage: java HistogramEqualization <input file name> <output file name>");
        }
        else{
            HistogramEqualization he = new HistogramEqualization(args[0], args[1]);
            he.setSize(1024, 500);
            he.setVisible(true);
            he.setDefaultCloseOperation(JFrame.EXIT_ON_CLOSE);
        }
    }
    
}

Thursday, 23 February 2017

AJITH KP

Histogram Equalization Algorithm and Implementation in Java

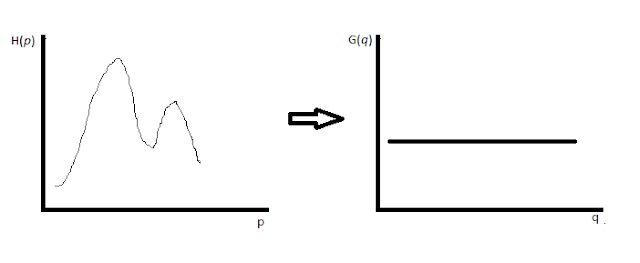
Histogram equalization is a technique used to enhance the contrast of image using the histogram of image. The histogram of image represents the frequency of gray levels in the image.The gray levels of image varying from 0 to 255, that is a gray scale image's pixel size is 8 bits(1 byte). So the histogram contains frequency of occurrence of values from 0 to 255.
The aim of histogram equalization is used in digital image processing is to generate an image with equally distributed brightness level over the whole brightness scale.

Histogram Equalization
Histogram equalization can enhance contrast for brightness values close to histogram maxima and decrease contrast near minima.

ALGORITHM

Step 1. Image size: NxM, gray level from 0 to 255, create an array H of size 256 and initialise it with 0.
Step 2: Create image histogram by scan every pixel of image and increment the relevant member of array.
            H[grayval(pix)] = H[grayval(pix)]+1.
Step 3: Form a cumulative histogram CH of size 256.
            CH[0] = H[0]
            CH[i] =  CH[i-1] + H[i], i=1,2,3,...255.
Step 4: Set T[i] = Round((255*CH[i])/(NxM))
Step 4: Rescan image and create new image with gray level value,
            NewImg[x][y] = T[OldImg[x][y]]

SCREENSHOTS

Histogram Equalisation
Histogram Equalisation in Java: 1

Histogram Equalisation in Java
Histogram Equalisation in Java: 2

SOURCE CODE

import java.awt.GridLayout;
import java.awt.image.BufferedImage;
import java.awt.image.WritableRaster;
import java.io.File;
import javax.imageio.ImageIO;
import javax.swing.ImageIcon;
import javax.swing.JFrame;
import javax.swing.JLabel;
import javax.swing.JPanel;


/**
 *
 * @author AJITH KP (http://fb.com/ajithkp560)
 * http://www.terminalcoders.blogspot.com
 * 
 */
public class HistogramEqualization extends JFrame{
    HistogramEqualization(String in, String out){
        super("..:: Histogram Equalization ::..");
        try {
            this.setLayout(new GridLayout(1, 2, 10, 10));
            JPanel img1 = new JPanel();
            JPanel img2 = new JPanel();
            File f1 = new File(in);
            File f2 = new File(out);
            BufferedImage image1 = getGrayscaleImage(ImageIO.read(f1));
            img1.add(new JLabel(new ImageIcon(image1)));
            BufferedImage image2 = equalize(image1);
            ImageIO.write(image2, "png", f2);
            img2.add(new JLabel(new ImageIcon(image2)));
            this.add(img1);
            this.add(img2);
        } catch (Exception ex) {
            System.out.println(ex.getMessage());
        }
    }
    BufferedImage equalize(BufferedImage src){
        BufferedImage nImg = new BufferedImage(src.getWidth(), src.getHeight(), BufferedImage.TYPE_BYTE_GRAY);
        WritableRaster wr = src.getRaster();
        WritableRaster er = nImg.getRaster();
        int totpix= wr.getWidth()*wr.getHeight();
        int[] histogram = new int[256];

        for (int x = 1; x < wr.getWidth(); x++) {
            for (int y = 1; y < wr.getHeight(); y++) {
                histogram[wr.getSample(x, y, 0)]++;
            }
        }
        
        int[] chistogram = new int[256];
        chistogram[0] = histogram[0];
        for(int i=1;i<256;i++){
            chistogram[i] = chistogram[i-1] + histogram[i];
        }
        
        float[] arr = new float[256];
        for(int i=0;i<256;i++){
            arr[i] =  (float)((chistogram[i]*255.0)/(float)totpix);
        }
        
        for (int x = 0; x < wr.getWidth(); x++) {
            for (int y = 0; y < wr.getHeight(); y++) {
                int nVal = (int) arr[wr.getSample(x, y, 0)];
                er.setSample(x, y, 0, nVal);
            }
        }
        nImg.setData(er);
        return nImg;
    }
    BufferedImage getGrayscaleImage(BufferedImage src) {
        BufferedImage gImg = new BufferedImage(src.getWidth(), src.getHeight(), BufferedImage.TYPE_BYTE_GRAY);
        WritableRaster wr = src.getRaster();
        WritableRaster gr = gImg.getRaster();
        for(int i=0;i<wr.getWidth();i++){
            for(int j=0;j<wr.getHeight();j++){
                gr.setSample(i, j, 0, wr.getSample(i, j, 0));
            }
        }
        gImg.setData(gr);
        return gImg;
    }
    /**
     * @param args the command line arguments
     */
    public static void main(String[] args) {
        System.out.println("#! TERMINALCODERS ::..\nhttp://www.terminalcoders.blogspot.com");
        if(args.length<2){
            System.out.println("Usage: java HistogramEqualization <input file name> <output file name>");
        }
        else{
            HistogramEqualization he = new HistogramEqualization(args[0], args[1]);
            he.setSize(1024, 500);
            he.setVisible(true);
            he.setDefaultCloseOperation(JFrame.EXIT_ON_CLOSE);
        }
    }
    
}

Sunday, 19 February 2017

AJITH KP

Easiest way to convert RGB Color Image to Gray scale Image in Java

Hello GuyZ,
     I would like to share Java code to convert RGB images to Gray scale images. I have seen many Java codes which converts image to Gray scale by decomposing each pixel value to red, green and blue values. Then calculate (R+G+B)/3 and set this value to corresponding pixel.
     But I would like to share simplest code to convert color images to gray scale without calculations. The method I'm following is creating an Raster object, I'm using WritableRaster - because it allows reading and writing pixel values. Here I'm creating two WritableRaster objects - one for source image reading, second for writing pixels in output file.

WritableRaster wr = src.getRaster();
WritableRaster gr = gImg.getRaster();

Then using loop, read all pixels from source image and write it to output file. To read pixels, I used getSample(i, j, 0) function of WritableRaster, where i - column number, j - row number of pixel and 0 to get gray scale value for that pixel. After read gray scale value, set this value for output WritableRaster by using function, setSample(i, j, 0, gray_value). The gray_value is the value returned by getSample() function.
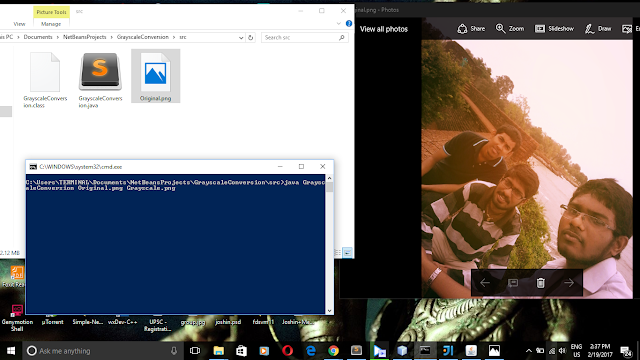
RGB Color image to Gray scale conversion Java
before converting to gray scale image
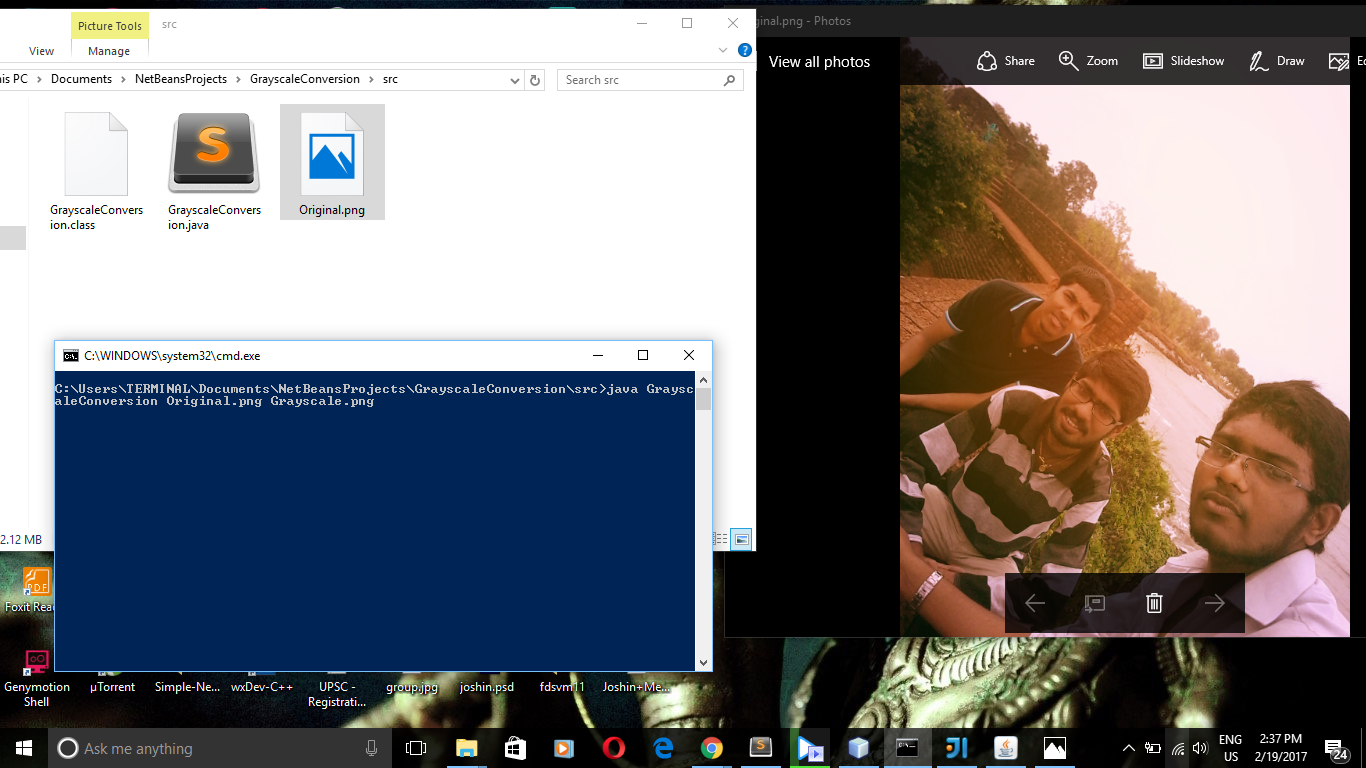
RGB Color image to Gray scale conversion Java
After converting to gray scale

Java Source Code

import java.awt.image.BufferedImage;
import java.awt.image.WritableRaster;
import java.io.File;
import javax.imageio.ImageIO;

/*
(C) AJITH KP (C) : TERMINALCODERS
*/

public class GrayscaleConversion {
    public static void main(String[] args) {
        System.out.println("#! TERMINALCODERS ::..\nhttp://www.terminalcoders.blogspot.com");
        if(args.length<2){
            System.out.println("Usage: java GrayscaleConversion <input file name> <output file name>");
        }
        else{
            try{
                File in = new File(args[0]);
                File out = new File(args[1]);
                BufferedImage img = ImageIO.read(in);
                BufferedImage gray = getGrayscaleImage(img);
                ImageIO.write(gray, "png", out);
                System.out.println("Grayscale image is saved in file: "+args[1]);
            } catch(Exception e){
                System.out.println(e);
            }
        }
    }

    private static BufferedImage getGrayscaleImage(BufferedImage src) {
        BufferedImage gImg = new BufferedImage(src.getWidth(), src.getHeight(), BufferedImage.TYPE_BYTE_GRAY);
        WritableRaster wr = src.getRaster();
        WritableRaster gr = gImg.getRaster();
        for(int i=0;i<wr.getWidth();i++){
            for(int j=0;j<wr.getHeight();j++){
                gr.setSample(i, j, 0, wr.getSample(i, j, 0));
            }
        }
        gImg.setData(gr);
        return gImg;
    }
    
}